How to Create a Custom Workspace in Adobe Premiere Pro
Category - Blogs on Adobe Premier Pro
Hello everyone, welcome to this blog on how to create a custom workspace in Adobe Premiere Pro. I’ll cover the steps to create a customized workspace which is easy to use for beginners in Premiere Pro. It is important to understand how workspace works in any application. Mastering workspace is a part of learning and mastering Adobe Premiere Pro. So, let’s first see what is a workspace exactly.
Table of Content
- What is a Workspace Premiere Pro?
- Premiere Pro Workspace Presets
- Saving Workspaces in Premiere Pro
- Overview of Premiere Editing Panels
- How to Customize Panels in Adobe Premiere Pro
- Overview of Premiere Editing Panels
- How to Add a New Panel in Premiere Pro
- How to rearrange a panel in Adobe Premiere Pro
- How to Undock a Panel in Adobe Premiere Pro
- Resizing Panels in Premiere Pro
- How to Save Your Own Custom Workspace in Premiere Pro
What is a Workspace Premiere Pro?
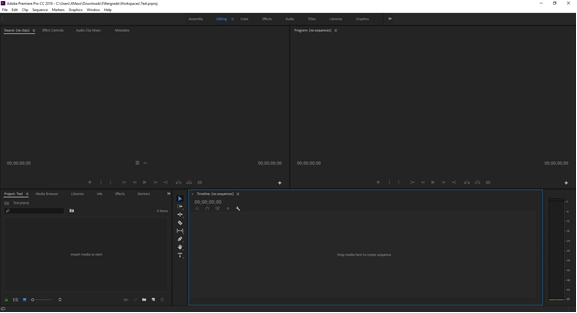
Premiere Pro workspace presets
The workspace is what you see when you open up a project in Premiere. This includes the project timeline, the source monitor, the viewer, and more. These are some of the more common parts of a workspace, but depending on your needs you can customize the workspace however you like.
Do you know that my first practical class on video editing started with the intro to Workspace? It is a crucial part to understand properly. So, kindly read this blog till the end.
You can arrange your panels around however you see fit. You can even nest multiple panels into one for easy access. It means that you can have a ton of information and menus packed into a small area!
By default, the Premiere Pro workspace will contain the Source Monitor in the top left, the Program Monitor in the top right, the Project panel in the bottom left, and the timeline in the bottom right. This is the Editing preset, and will be your first introduction to Premiere.
Premiere Pro Workspace Presets

Premiere Pro contains several workspaces already.
In addition to the default, which is the Editing workspace, you can also choose Assembly, Color, Effects, Audio, Titles, Libraries, and Graphics.
For many people, this may be all you need!
These presets are designed to be ideal for different types of work, and will be effective for most situations.
You can find these presets on the top of your program, with the currently selected one highlighted in blue.
It is recommended that you leave these as they are, in case you need to revert back to them. But you can edit and override these presets if you like.
Saving Workspaces in Premiere Pro
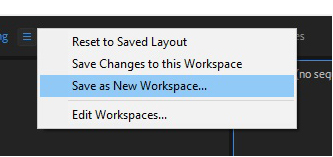
Saving a new Premiere Pro workspace and making it accessible for later is easy.
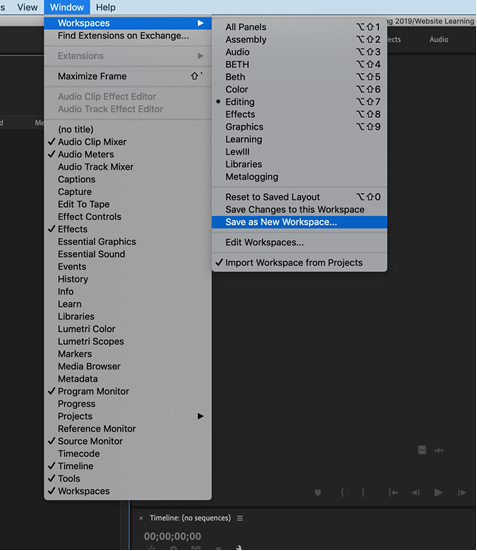
All you have to do is rearrange your panels into whatever combination you like, then click on the three horizontal bars next to whichever workspace you’re in.
One of the options will be to Save As New Workspace.
You will then be able to give this new workspace a name, and it will appear along with your presets.
If you want to customize how workspaces appear, you can click on the double arrows to the right of the workspace bar and click on Edit Workspaces.
You can then change which workspaces show up in the bar, in the overflow menu, or not shown at all.
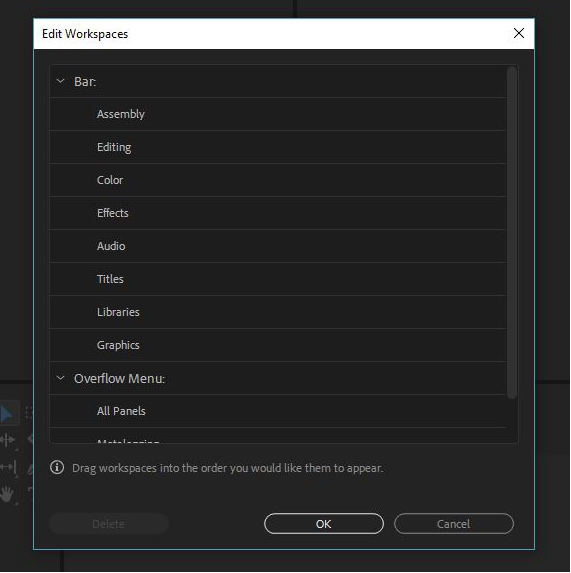
Your Own Workspace in Premiere Pro
Adobe Premiere Pro workstations are extremely customizable, and you can make the program work for you.
This is one of Adobe’s greatest strengths, and is one of the reasons why so many people use it.
Not only is the software powerful, but it is also versatile. Customizing your workspace to your project’s need will make every edit more efficient.
You’ll be able to spend more time editing, and less time looking for obscure menus and settings.
Overview of Premiere Editing Panels
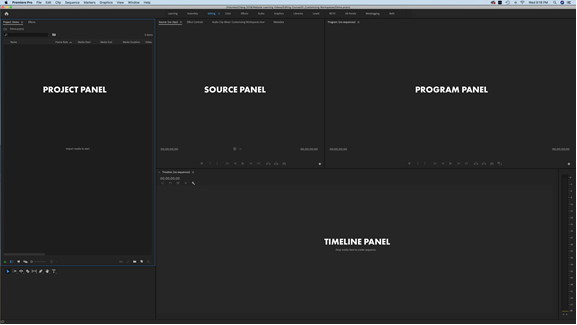
You’ll notice several windows when you first launch Premiere Pro. Let’s quickly discuss the functions of each of these panels.
Project Panel: This is where all the files that you’ll be using in your project will be organized. You’ll sort your footage, music, audio clips, images, graphics, etc. to be readily available for use in your project when you need it.
Source Panel: Here is the window where you’ll preview a video clip before deciding whether or not you want to add it to your video. Double click on a footage file in your Project Panel and it will appear in the Source Panel.
If you decide you want to use a portion of a video clip in your video, you can set an IN point by hitting the letter ‘I’ and then an OUT point by hitting the letter ‘O’.
You can then drag that portion of the clip into your Timeline Panel below to add it to your video.
Timeline Panel: Video and audio clips that are dragged into the Timeline Panel are now a part of your final video.
Once in the Timeline Panel, we can still move them, trim them, and manipulate them however we wish. Nothing is final until you are ready to export.
Program Panel: On the top right window is your Program Panel. This is where you’ll preview how your edited video is looking. Any changes that you make in your Timeline Panel will be reflected in the Program Panel.
How to Customize Panels in Adobe Premiere Pro
Premiere Pro makes it super easy and intuitive to adjust all the editing panels. This is very helpful when editing since you’ll be able to quickly adjust your windows to best adapt to what you are working on at the time. More on this idea in a moment.
How to Add a New Panel in Premiere Pro
If you’re missing a certain panel, simply navigate up to the Window bar and click on the panel you’d like to add. It will automatically be inserted into your workspace.
From there you can easily click and drag the panel wherever you would like it to be. As you drag the panel around and hover over various spaces, you’ll see the drop zones turn purple and green. This indicates to you all the possible places where you can add or move a panel.
How to rearrange a panel in Adobe Premiere Pro
To move an existing panel from one location to another, simply hold and drag it to another location.
You can move panels to the left, right, center, as well as the bottom and top sections of another panel and it will simply add to that section of the existing panel.
You’ll then see labels at the top of those groupings of panels where you can navigate between each of the individual panels.
If you drag a panel to the center drop zone, it will nest that panel under the entire panel in a grouping zone.
Lastly, if you drag it all the way to one of the far sides (where the green zone appears) it will result in the panel transforming to take up that entire portion of the window.
How to Undock a Panel in Adobe Premiere Pro
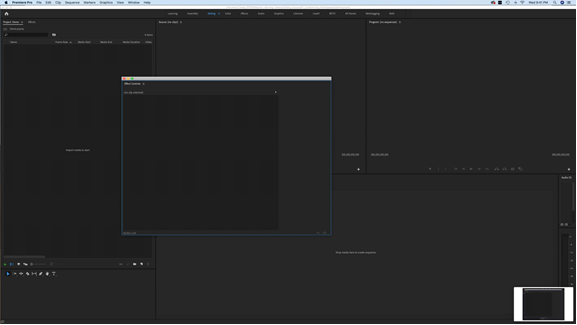
Click on the three little bars to the right of the panel title and click the option to choose to undock a panel. This will cause the panel to free float, as well as have the ability to be minimized. It can be helpful, for example, if you want to have multiple shooting days or multiple locations worth of footage folders open and viewable at once. Also it allows you the freedom to drag a panel to an extra side monitor.
Resizing Panels in Premiere Pro
You can very easily click and drag along the border between panels to quickly resize the panels as you wish.
How to Save Your Own Custom Workspace in Premiere Pro
I am a creature of habit. I edit so much that it is second nature to me. If you change something in my custom workspace, I’m like a deer in headlights. I suddenly don’t know where my right hand is.
Premiere Pro makes it super easy to set up your editing workspace exactly how you like it and then easily save it, so you’ll never be lost again.
You are done!
Author Introduction
Hi, Myself Gulshan. I’m a graphic and video editor. I completed my diploma course in video editing from Post Production Institute in Delhi. Deepak sir gave me this blog topic to explain on creating custom workspace in Adobe Premiere Pro. This is all about the blog of Premier Pro which is given to my project.
Thank You!!
